Again, Microsoft has a new feature for its users. The tech giant has introduced an innovative security feature called Passkey, which leverages cutting-edge passwordless authentication technology. By setting up your Passkey, you can bid farewell to the hassle of remembering complex passwords and embrace a more convenient and secure way of accessing your Microsoft account. Let’s take a look at this step-by-step process of enabling and utilizing your Passkey, ensuring that your digital identity remains protected against potential threats.
Understanding Passkeys: a primer
Before diving into the setup process, let’s explore what Passkeys are and how they function. Passkeys are a form of passwordless authentication that relies on public-key cryptography to verify your identity securely. Unlike traditional passwords, which can be guessed, phished, or stolen, Passkeys are unique, device-specific credentials that cannot be replicated or shared.
The core principle behind Passkeys is biometric authentication. Instead of entering a password, you’ll use your biometric data, such as your fingerprint or facial recognition, to unlock your Microsoft account. This not only enhances security but also adds an extra layer of convenience, as you no longer need to remember complex passwords or carry physical security keys.
Preparing for Passkey setup
To set up your Passkey, you’ll need a compatible device running the latest version of Windows 11 or a compatible browser on Windows 10. Microsoft has integrated Passkey support into its ecosystem, making the setup process seamless and user-friendly.
Additionally, ensure that you have enabled biometric authentication on your device. This typically involves setting up your fingerprint or facial recognition during the initial device setup process. If you still need to do so, you can easily configure biometric authentication by navigating to the Settings app on your Windows device.
Access your Microsoft account and enable Passkey authentication
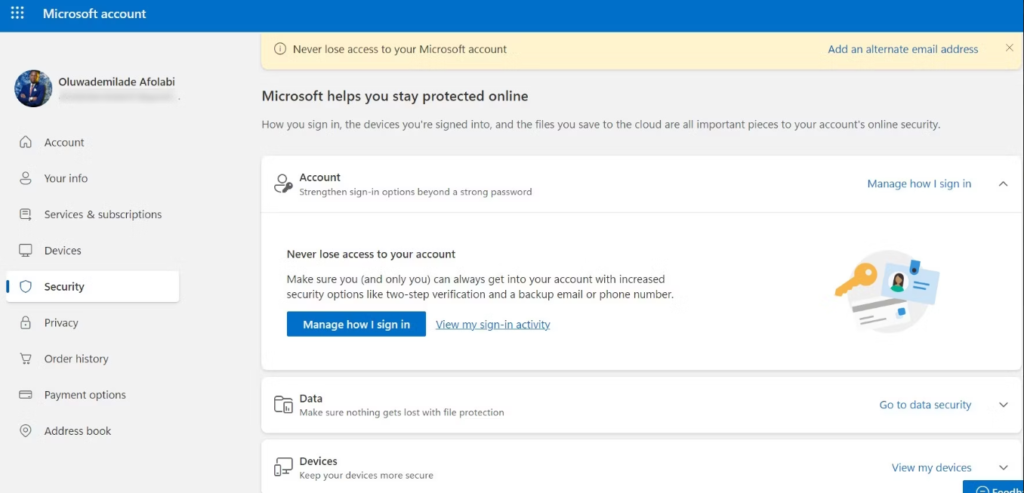
Step 1: The first step in setting up your Passkey is to access your Microsoft account settings. Open your preferred web browser and navigate to the Microsoft account page (account.microsoft.com). Sign in to your Microsoft account using your existing credentials. Once logged in, click the “Security” option in the left-hand navigation menu.
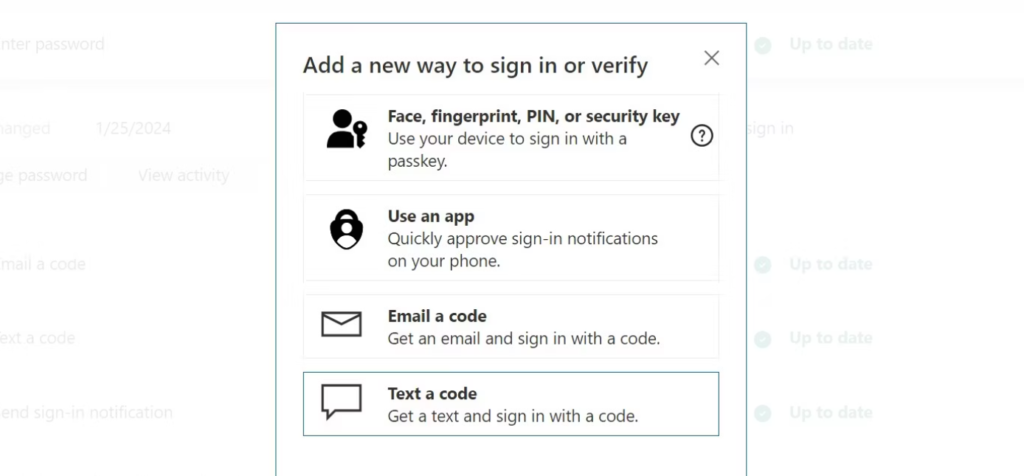
Step 2: After accessing your account settings, you must enable Passkey authentication. Follow these steps: scroll down to the “Passwordless account” section and click the “Set up” button. A new window will open, prompting you to set up your Passkey. Follow the on-screen instructions to complete the setup process, which may involve verifying your identity and authenticating your biometric data.
Register your devices and test your Passkey
Step 3: One of the key advantages of Passkeys is their portability across compatible devices. To ensure seamless access to your Microsoft account from multiple devices, you must register each device individually. On the Passkey setup page, click on the “Register a new device” option. Follow the prompts to authenticate with your biometric data on the device you wish to register. Repeat this process for each additional device you want to use with your Passkey.
Step 4: After completing the setup process, it’s a good idea to test your Passkey to ensure it’s working correctly. Here’s how: Sign out of your Microsoft account on all devices. Attempt to sign in again using your Passkey instead of a password. Authenticate with your biometric data (fingerprint or facial recognition) when prompted. If successful, you can access your Microsoft account without entering a password.


Maintaining Passkey Security
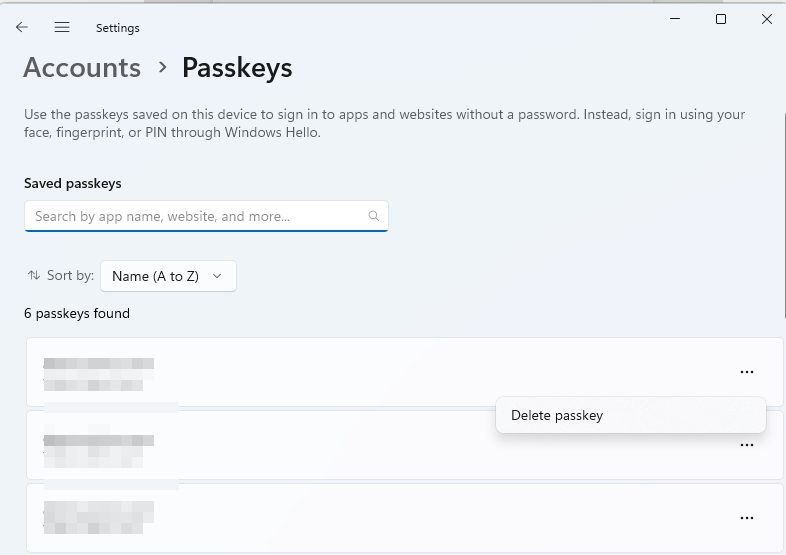
While Passkeys offer enhanced security, followingit’s best practices to keep your digital identity safe is crucial. Keep your devices secure and up-to-date with the latest software updates. Enable additional security features like two-factor authentication for added protection. Be cautious of phishing attempts, and never share your biometric data or Passkey information with untrusted sources. Regularly review your registered devices and remove any devices you no longer use or have lost access to.
If you encounter any issues during the Passkey setup or usage process, Microsoft offers various support resources. Visit the Microsoft Passkey support page for detailed troubleshooting guides and FAQs. Contact Microsoft Support directly for personalized assistance. You can also join the Microsoft Community forums to seek advice from other users and experts.
Frequently Asked Questions
To create a better understanding of Passkeys, here are some highlights gathered from the most frequent questions that users have asked online.
Passkeys work seamlessly across compatible devices and platforms, including Windows, iOS, and Android, allowing you to use your Passkey to access your Microsoft account.
If you lose a device with a registered Passkey, revoke access by accessing your Microsoft account settings and removing the device from the list of registered devices to prevent unauthorized access.
Using Passkeys on shared or public devices is not recommended due to potential security risks. Use Passkeys on trusted, personal devices for optimal security.
Passkeys cannot be reset or recovered like traditional passwords. If you forget or lose access to your Passkey, go through Microsoft’s account recovery process to verify your identity and set up a new Passkey.
You can use both a password and a Passkey for your Microsoft account. This helps access your account from devices that don’t support Passkey authentication or, if you prefer, having a backup authentication method.
Most importantly, with your Passkey in place, you can rest assured that your Microsoft account is well-protected against potential threats, allowing you to focus on what truly matters – leveraging the power of technology to enrich your personal and professional life.


